People's Assembly Teaching Strategy | Facing History & Ourselves
Facing History & Ourselves
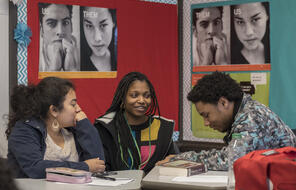
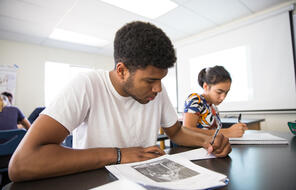
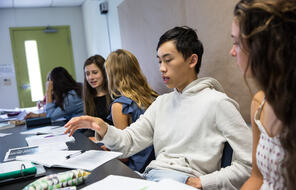
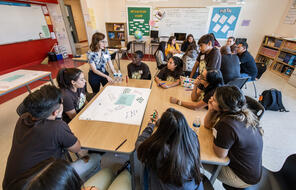
Students sitting in groups in a classroom
Teaching Strategy

People's Assembly

Help students communicate independently and develop as active listeners by giving them the opportunity to discuss and share ideas in the format of a people's assembly.

Published:

This resource is intended for educators in the United Kingdom.

At a Glance

teaching-strategy copy
Teaching Strategy

Language

English — UK

Grade

6–12

Overview

About This Teaching Strategy

This teaching strategy was designed for use in UK classrooms. Teachers in other contexts may choose to adapt it for their students.

A people’s assembly is a powerful process, which gives students the opportunity to review and discuss a topic, text or question before feeding their ideas back to the class. Students work in groups and take it in turns to share their ideas, using hand signals to communicate with and respond to each other. The discussion is managed by a student facilitator and recorded by a student note-taker, who is also responsible for feeding ideas back to the class. This strategy boosts student independence, creates an inclusive space, and develops students as active listeners. It can also help increase student confidence and assist with community building.

Some people’s assemblies run with three values at their core, which are a powerful means of grounding the discussion and creating a culture of respect:

  • Inclusivity: Everyone’s voice is valued and everyone has the right to be heard. No one person dominates the discussion. The loudest voice is not always right: a people’s assembly is about sharing ideas and learning from each other. Everyone feels respected, and able to participate safely without fear of judgement or ridicule.
  • Active Listening: Everyone genuinely listens to what others are saying, and participants are not thinking in advance about what they are going to say. 
  • Trust: Everyone has belief in the assembly process, in the hand signals, in the facilitation, the note-taking, and in the sharing of ideas. Participants acknowledge that the process won’t be perfect, but it will only work if everyone trusts in the process and works together.

Save this resource for easy access later.

Save resources to create collections for your class or to review later. It's fast, easy, and free!
Have a Workspace already? Log In

Lesson Plans

Steps for Implementation

Give students the information that they will be discussing in their groups. This could be a text or the unit that students have studied. Whatever the stimulus, ensure that students have enough information to be able to engage thoughtfully in the discussion.

Explain to students what question they will be discussing in their breakout groups. It is worth projecting it or writing it on the board so students can refer to it throughout.

Explain the hand signals to the students as they will need these when discussing the topic or question. The hand signals that can be used with your students are as follows:

  • Wavy hands: If they agree with something a peer has said, invite them to wave their hands.
  • Point: If they want to add to what someone has said or they do not agree with what has been said, they point a finger upwards. This means they have a point to make.

Traditional people’s assemblies have more hand signals; however, given the fact that students are likely to be doing this for the first time, it is helpful to keep it simple, and to keep the exercise as one in which all students are able to take it in turns to express their views.

If desired, you may wish to write the hand signals on the board alongside the question that students are discussing.

Divide students into breakout groups of five to six. Ensure each group has a note-taker, who records the ideas that are shared, and a facilitator, who manages the discussion to ensure everyone gets to share their viewpoint. Students can self-select, or you can assign each of these roles to two students from each group.

In their groups, ask students to sit in a circle and go round in a set order, ensuring that everyone gets to share something. Inform students that they should use the hand signals as outlined. It is the facilitator who watches for these hand signals and manages them, trying to ensure that no one person dominates.

Invite the note-takers to the front of the classroom to share their group’s key ideas with the rest of the class.

Following a people’s assembly, it is important to build in time for students to reflect in journals and/or a class discussion. The following prompts can help spark this reflection:

  • What new, different, or deeper understanding of the input – the text(s) or essential question – do you have after participating in the people’s assembly? 
  • What was it like participating in a people’s assembly? 
    • How did using the hand signals feel?
    • How easy or difficult was it to be an active listener? 
    • How easy or difficult was it to trust in the process? 
    • What, if anything, made this process feel inclusive? What, if anything, made this process feel exclusive? What could you do or the group do to make the process more inclusive for everyone?

For more teaching strategies designed for UK Educators, view our PDF resource Teaching Strategies.

You might also be interested in…

Unlimited Access to Learning. More Added Every Month.

Facing History & Ourselves is designed for educators who want to help students explore identity, think critically, grow emotionally, act ethically, and participate in civic life. It’s hard work, so we’ve developed some go-to professional learning opportunities to help you along the way.

The resources I’m getting from my colleagues through Facing History have been just invaluable.
— Claudia Bautista, Santa Monica, Calif